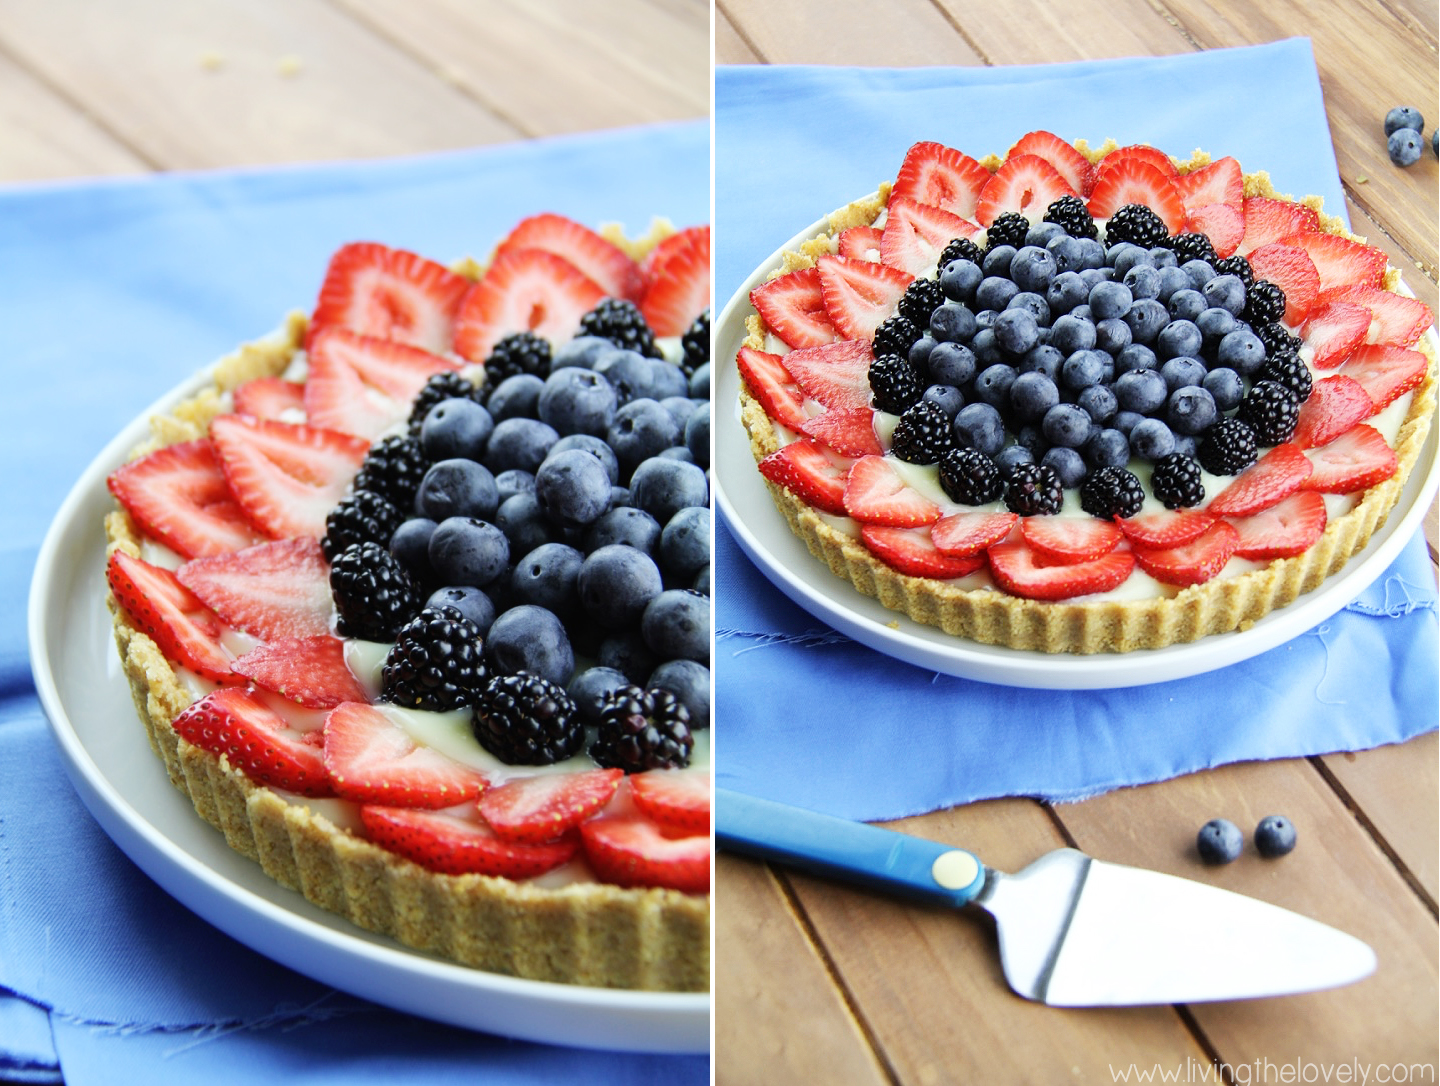
Quick and Easy Triple Berry Tart Recipe

Hello!!

Long time no post! I'm so very sorry. Seems like I'm failing on those new years resolutions already! *fail* But I *do* have a good reason! Kinda. Sorta. See back in late January I ended up taking a very last minute (I'm talking a few days notice) 3 week vacation, which made it really difficult to update regularly! Not for lack of trying though! I had even prepared a Valentine's day recipe and a DIY craft, and photographed it all the night before my departure and was planning on posting updates while on my vacation. Unfortunately I ran into some unforeseen problems with internet connection while I was there – I was promised high speed wifi and was left with internet that wouldn’t even connect!

Alas, after many, many, many frustrating attempts to connect to the interwebs I took it as a sign from the universe to just chill and actually *be* on vacation. So I did! However, when I got back I ended up getting really sick (caught something awful on the plane ride back), and then drowning in work (it happens when you take 3 weeks off). After all that, life caught up with me and things have been really busy, and before I knew it its been 3 months!

However, all this time away doesn’t mean I have been doing nothing worthy of blogging about! Oh contrer! If you follow me on Instagram you will see I have been preoccupied with starting up a garden and many other fun stuff. I've been trying lots of new things and new recipes and am excited to come back with lots of fun new content! :)

quick and easy triple berry tart recipe. What I love about it is its no bake, only 5 ingridients from the pantry, and super simple. But it  LOOKS fancy! All the look none of the work ;)


So in order to make it up to you, here's a recipe for a super easy and super delicious Triple Berry tart which really signals that summer has arrived!! If you have been super busy like me, but need a quick delicious dessert, that also makes a statement, then look no further! This is really great for when you want to make a great homemade dessert for a party or special event, but don’t have the time (or just feeling too lazy) to make anything too complex. And what with the crazy heat of summer well on its a way, its a great dessert to take to your neighbourhood bbq which has the added bonus of not needing to turn on your hot oven!

quick and easy triple berry tart recipe. What I love about it is its no bake, only 5 ingridients from the pantry, and super simple. But it  LOOKS fancy! All the look none of the work ;)


This tart can easily be changed and customized in endless ways to whatever fruit you have whether it be different types of berries, or perhaps banana slices, or kiwi, or even some peaches! You could even change the pudding flavours!

So make this super quick and easy Triple Berry Fruit Tart and let me know how it goes 😃

quick and easy triple berry tart recipe. What I love about it is its no bake, only 5 ingridients from the pantry, and super simple. But it  LOOKS fancy! All the look none of the work ;)


Triple Berry Tart

* 10 sheets of graham crackers, crumbled up (or roughly 1.5 cups)
* 1/3 cup sugar
* 1/2 cup of melted butter
* 1 pudding packet (I used Jello brand that serves four)
* Milk as required by pudding packet
* Fruit to Decorate

1. Break up your graham cracker cookies into smaller pieces by hand, and then place in to a ziplock bag. Seal firmly. And bang it with a rolling pin! (great therapy! lol) keep banging it until its nice and crumbly.Once completely crushed pour crumbs into a large bowl. If you don't have cookies but rather the crumbs, this should equally roughly 1.5 cups, so measure that and pour it into a bowl.

2. Add your sugar to the crumbs and mix until throughly incorporated. Then add in your melted butter and mix! Depending on a variety of things you may need a bit more cookies or a bit more butter. You want to be able to mix it to the point where it becomes like sand that will hold its shape when squished down.

3. Take your tart pan and press it all down in the pan to form a crust. Place in the fridge to set for a few hours. 

4. Prepare your fruit topping - wash and slice!

5. Once the crust has set in the fridge, prepare your pudding mix by mixing the required powder to milk mixture called for on the box. It will be liquidy at first but if you keep mixing it will thicken! Pour your thickened pudding mixture into the tart. Decorate with Fruit. Place in fridge to set until ready to be served!

Bon apetite! 😃 

quick and easy triple berry tart recipe. What I love about it is its no bake, only 5 ingridients from the pantry, and super simple. But it  LOOKS fancy! All the look none of the work ;)


Super Soft Thumbprint Butter Cookies

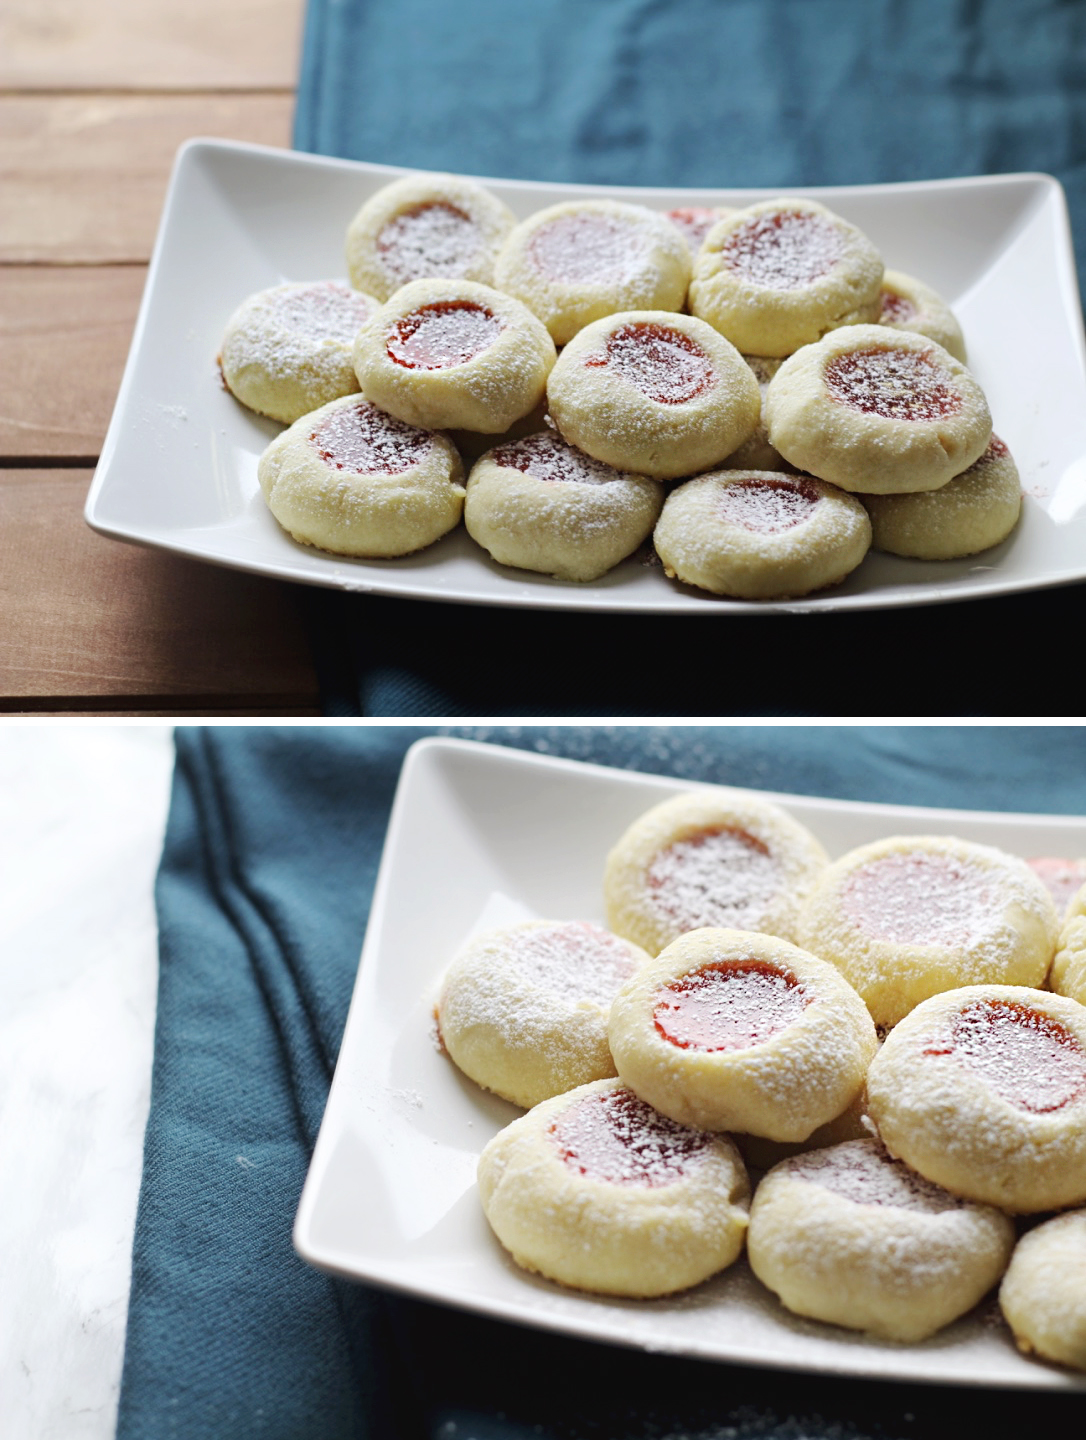
These cookies are seriously sooo quick and easy to throw together (only 5 ingredients!) and make the yummiest melt in your mouth butter cookies. These thumbprint cookies are a great addition to my Christmas cookie plate!

OH. EM. GEE. 

YA GUYS. These cookies. They are to die for. Not only are they super soft and just *melt* in your mouth, they are super, duper, easy to make. Like I'm talking ONLY 5 ingredients! It's so easy and has ingredients that any basic pantry would have. This may lead you to think "well it can't be so good if it's so basic". But you would be wrong, friend. Very wrong. 

I like to make a batch of these to take to work around the holidays and they are always a great hit. Its a very simple cookie and appeals to most palettes, and you would be hard pressed to find someone who 'hates' soft melt in your mouth butter cookies. In fact they were so good my health conscious boss even asked for seconds!

These cookies are thrown together real quick but make a really nice, smooth, easy to work with dough. I used my kitchen aid mixer, but you can of course use a regular mixer. Its just a basic 'mix your butter with sugar, beat, then add the rest' kind of recipe. The result is a super delicious butter cookie that melts in your mouth. They are great both warm and cooled. They aren't too sweet so its a great 'base' cookie - the cookie itself is soft and melt-y, but you can add other treats to make it sweet such as jam, chocolate, and icing sugar.

Its a great Christmas cookie recipe, but honestly I would have them all year round. Its a great base so I plan on trying different recipes in the next little while to see how they come along. So if you are looking for a great quick and easy Christmas cookie look no further than these soft butter cookies. Ok. I think I might have accidentally over hyped these cookies, thus causing extremely high expectations that no cookie could live up to. Forget what I said. They are just 'meh' cookies. 'Meh' cookies that I highly suggest you make ;)


These cookies are seriously sooo quick and easy to throw together (only 5 ingredients!) and make the yummiest melt in your mouth butter cookies. These thumbprint cookies are a great addition to my Christmas cookie plate!
5.jpg

Soft Thumbprint Butter Cookies

Ingredients: 

  • 1 cup softened salted butter (BE SURE to use butter - no margarine here please!)
  • ½ cup icing sugar, plus a little more for dusting the cookies at the end
  • 2 teaspoons vanilla
  • ¼ teaspoon salt
  • 2 cups flour
  • ½ cup jam (any flavour but I usually use Strawberry or Raspberry)
  1. Preheat oven to 325°F. Line a baking sheet with parchment paper. Be sure to do this because unlike other cookies made with a high butter base these cookies stick to the pan!

  2. In a bowl (or your kitchen aid mixer with the paddle attachment), beat the butter and sugar together until light and fluffy. Add vanilla and salt. Switch to low and gently mix in flour, just until combined - you don't want to over mix!

  3. Roll balls of dough into 1-inch balls (about 1 tablespoon each). Place dough balls on parchment lined baking sheets. Press down the center of each ball with your thumb (they are thumbprint cookies after all!). I have also used the back side of my teaspoon measuring spoon before too!

  4. Fill centers with a teaspoonful of the jam of your choice. Bake 12-15 minutes, making sure to not over bake. The baking of these cookies is a bit special - when they are ready they wont look ready because they wont get golden brown on the tops. That's ok. We don't want them to! When it gets golden on the top it means its over baked and will result in a dry cookie. Instead, to check if the cookie are ready carefully check the undersides to see if they are golden. If the cookie lifts (it wont if its not baked) and is golden underneath you are good to go! Let them cool on the baking sheet, then transfer to cooling rack.

  5. When cookies are completely cooled (otherwise it will melt into the cookies), dust with icing sugar. Cookies can be kept in a container for a few days (though they probably wont last that long!)

If you try the other flavours let me know how they turned out :)


These cookies are seriously sooo quick and easy to throw together (only 5 ingredients!) and make the yummiest melt in your mouth butter cookies. These thumbprint cookies are a great addition to my Christmas cookie plate!
quick and easy Christmas cookie recipe anyone? Super soft butter cookies that just melt in your mouth :)


Strawberry Sunshine Tea Cake

Over the weekend I headed in to the kitchen with the intention of baking up some sort of cake. I was in the mood for something smooth, and fluffy, and, well, cakey. However, I didn’t have any specific recipe in mind as I kept opening and closing the same kitchen cabinets, trying to find something to inspire me. I knew I wanted cake, and I knew a nice Valentines Day theme would be cute, and I was also thinking about something ‘cheerful’. “What? How can cake be cheerful??” I hear you cry, very easily I reply, it has to make you smile. Or something like that. You know how a yummy berry fruit tart makes you think of lovely summer, or how a peach crumble pie makes you think of a sunny spring weekend? Well I wanted to feel me some sunshine cause the reality of -35C weather outside just wasn’t cutting it. That’s when I saw the bowl of strawberries in the back of our fridge and it hit me – strawberries! Sunshine! Oh joy! I will make a strawberry cake.

strawberry tea cake | www.livingthelovely.com


Then I set about on Pinterest looking for the perfect recipe – which turned out to be a bad idea. Not only did I not find the type of recipe I was looking for (think a soft summery strawberry tea cake), I ended up side tracked an hour later looking at an article on what my personality type was, and what career I am best suited for (apparently I would make a great Carpenter or Mechanic – which is surprising given that I can’t tell the difference between a wrench and a screwdriver half the time). Frustrated with the inability of the internet to tell me WHAT I SHOULD DO WITH MY LIFE, I went back to figuring out what on earth I was gonna make. I finally settled on making an old classic I had made before at my previous blog, a simple strawberry tea cake. However, taking note from my previous attempt, I decided to make some changes to make the cake more moist (it had turned out a tad dry previously).


I decided this would be a great opportunity to use some Greek yogurt to not only make this cake moist, but also somewhat healthier (hey every bit helps right?). I was pretty happy with the final result! I decided to give it a Valentines Day theme by being all classy and cutting the Strawberries into thin slices and decorating with borders around the cake. I also made a little strawberry heart in the center. How cuutttteeeee right?


How it turned out: This recipe turned out pretty great! If measuring by nothing but the fact that it was all gone about 20 minutes after I took these pics, I would say the family loved it! The Greek yogurt did a great job of adding the moisture I was looking for. This produces a really great rich and dense cake, which would be a great ‘tea cake’ in my opinion. So if you are looking for a summer strawberry tea cake recipe, give this one a go! Also, this produces a bit of a sweet cake, so if you would like you could probably cut out ¼ cup of the sugar and still be good.


strawberry tea cake | www.livingthelovely.com

Strawberry Tea Cake

Ingredients:

1/3 cup unsalted butter, at room temperature

1 1/2 cups all-purpose flour

1 1/2 teaspoons baking powder

1/2 teaspoon salt

1 cup granulated sugar

1 large egg

1/2 cup Greek Yogurt *or substitute the water + Greek yogurt for 1 cup of regular Yogurt

1/2 cup of water

1 teaspoon vanilla

 2 cups of strawberries (or less or more depending on what you like)

1 tablespoons sugar, for sprinkling on top of the strawberries

Some Icing sugar to dust on the cake once its baked.


Directions:

1. Preheat oven to 350 degrees. Line your cake pan with parchment paper. 

2. Sift flour, baking powder, and salt together into a separate bowl. Set aside.

3. Sprinkle some sugar over your strawberries if they aren’t naturally very sweet like mine, and set aside.

strawberry valentines day cake | www.livingthelovely.com

4. Mix your greek yogurt and water together in a bowl until the lumps have mostly dissolved. Set aside.

greek yogurt add to batter

5. Beat your butter and 1 cup sugar in a bowl with an electric mixer. Mix until pale and fluffy. Add in egg, Greek yogurt/water mixture (or instead use 1 cup of regular yogurt), and vanilla. Mix until well combined. Now when you add your yogurt mixture to the batter it may make it look super gross. Like its curdled and gone bad or something. ITS OK. Just continue. Trust me on this.

6. Gradually mix in your flour mixture to the gross looking buttery mixture. (tada! It now looks like a really good thick cake batter).

7. Transfer the batter into your pan (It’s a really thick batter so its ok if it resembles something like a very soft bread dough). Arrange your strawberry slices on top of the batter.

8. Bake in the oven for about 20-25 minutes. Be sure to adjust baking time for a hotter or cooler oven.  Bake the cake until a toothpick entered in the center of the cake comes out clean. This cake actually ends up with a pretty white top. If you prefer a golden topped cake, put it under the broiler for a few minutes like I did. (tastes great either way)

9. Once cake is COMPLETELY cooled, sprinkle on some icing sugar to make it extra special

4 Ingredient Strawberry Frozen Yogurt

I don’t know about you guys but I love me some fro-yo! All those delicious and yummy flavours and best of all its HEALTHY. Can you imagine? Something that tastes good and is actually not bad for you? Its pretty much healthy ice cream (at least that’s how I have been justifying my way too frequent visits to the Frozen Yogurt shop to myself). But you know whats one thing I don’t like about Frozen Yogurt? The price! I swear I have spent a few hundred dollars more than I should have on frozen yogurt. Another thing that I don’t quite love is not knowing how they are flavoured and coloured. All this led me to an idea - what if I could make this myself? To google it is! 

Easy_homeade_4_Ingredient_Strawberry_Yogurt_Frozen


Unfortunately I wasn’t able to find as many recipes as I had thought, and all the ones I did find either had some weird ingredients I had never heard of before or used an ice-cream maker (which I don’t have). That was until I stumbled upon this beautiful gem of a recipe here. 4 ingredients and all you need is a blender? I’m sold!

The final result turned out delicious. It left a perfect pop of strawberry goodness in your mouth. The only problem I had with it was that it tends to melt a bit fast so its best to single serve it and pop the rest back in the freezer. Enjoy!

strawberry_frozen_yogurt_froyo


Strawberry Frozen Yogurt 

(source)

Ingredients: 

4 cups frozen strawberries
3 Tablespoons honey
1/2 cup plain yogurt (non-fat or full fat)
1 Tablespoon fresh lemon juice

Directions:

Add all the ingredients into a blender and blend until smooth! Serve immediately or freeze until needed. 

**If you do not have any frozen strawberries (like I didn’t) never fear, you can still make this with fresh strawberries. Wash your berries, and chop and measure 4 cups worth of strawberries. Then take out a baking pan and lay some parchment paper on it. Place out the strawberries on the pan, and sprinkle on some sugar if you have tart strawberries. Then pop it into the freezer until fully frozen. The parchment paper allows your strawberries to easily peel off once they are frozen. 

strawberry_frozen_yogurt_easy_recipe