Merry Christmas! And a free Christmas cupcake topper printable

Hello everyone!

So sorry about the late post. I was planning on getting this up wayyy before Christmas so that people could actually, you know, use them for Christmas. Alas, that was not to be, but I figured I should share them now anyways so that maybe you can use them for next Christmas! And now you have 365 days to plan ahead! ;)

So the reason I fell behind on posting these is I kept planning on baking the actual cupcakes and making the home made frosting, making the toppers and posting them. I had already done it for my office's Christmas party this year, and had snapped a few pics of them (in my office!), but I was planning a whole photoshoot to get some real nice pics. However, since that proved next to impossible, I decided to just share a few of the pics I took from work, so please excuse the less than stellar shots!

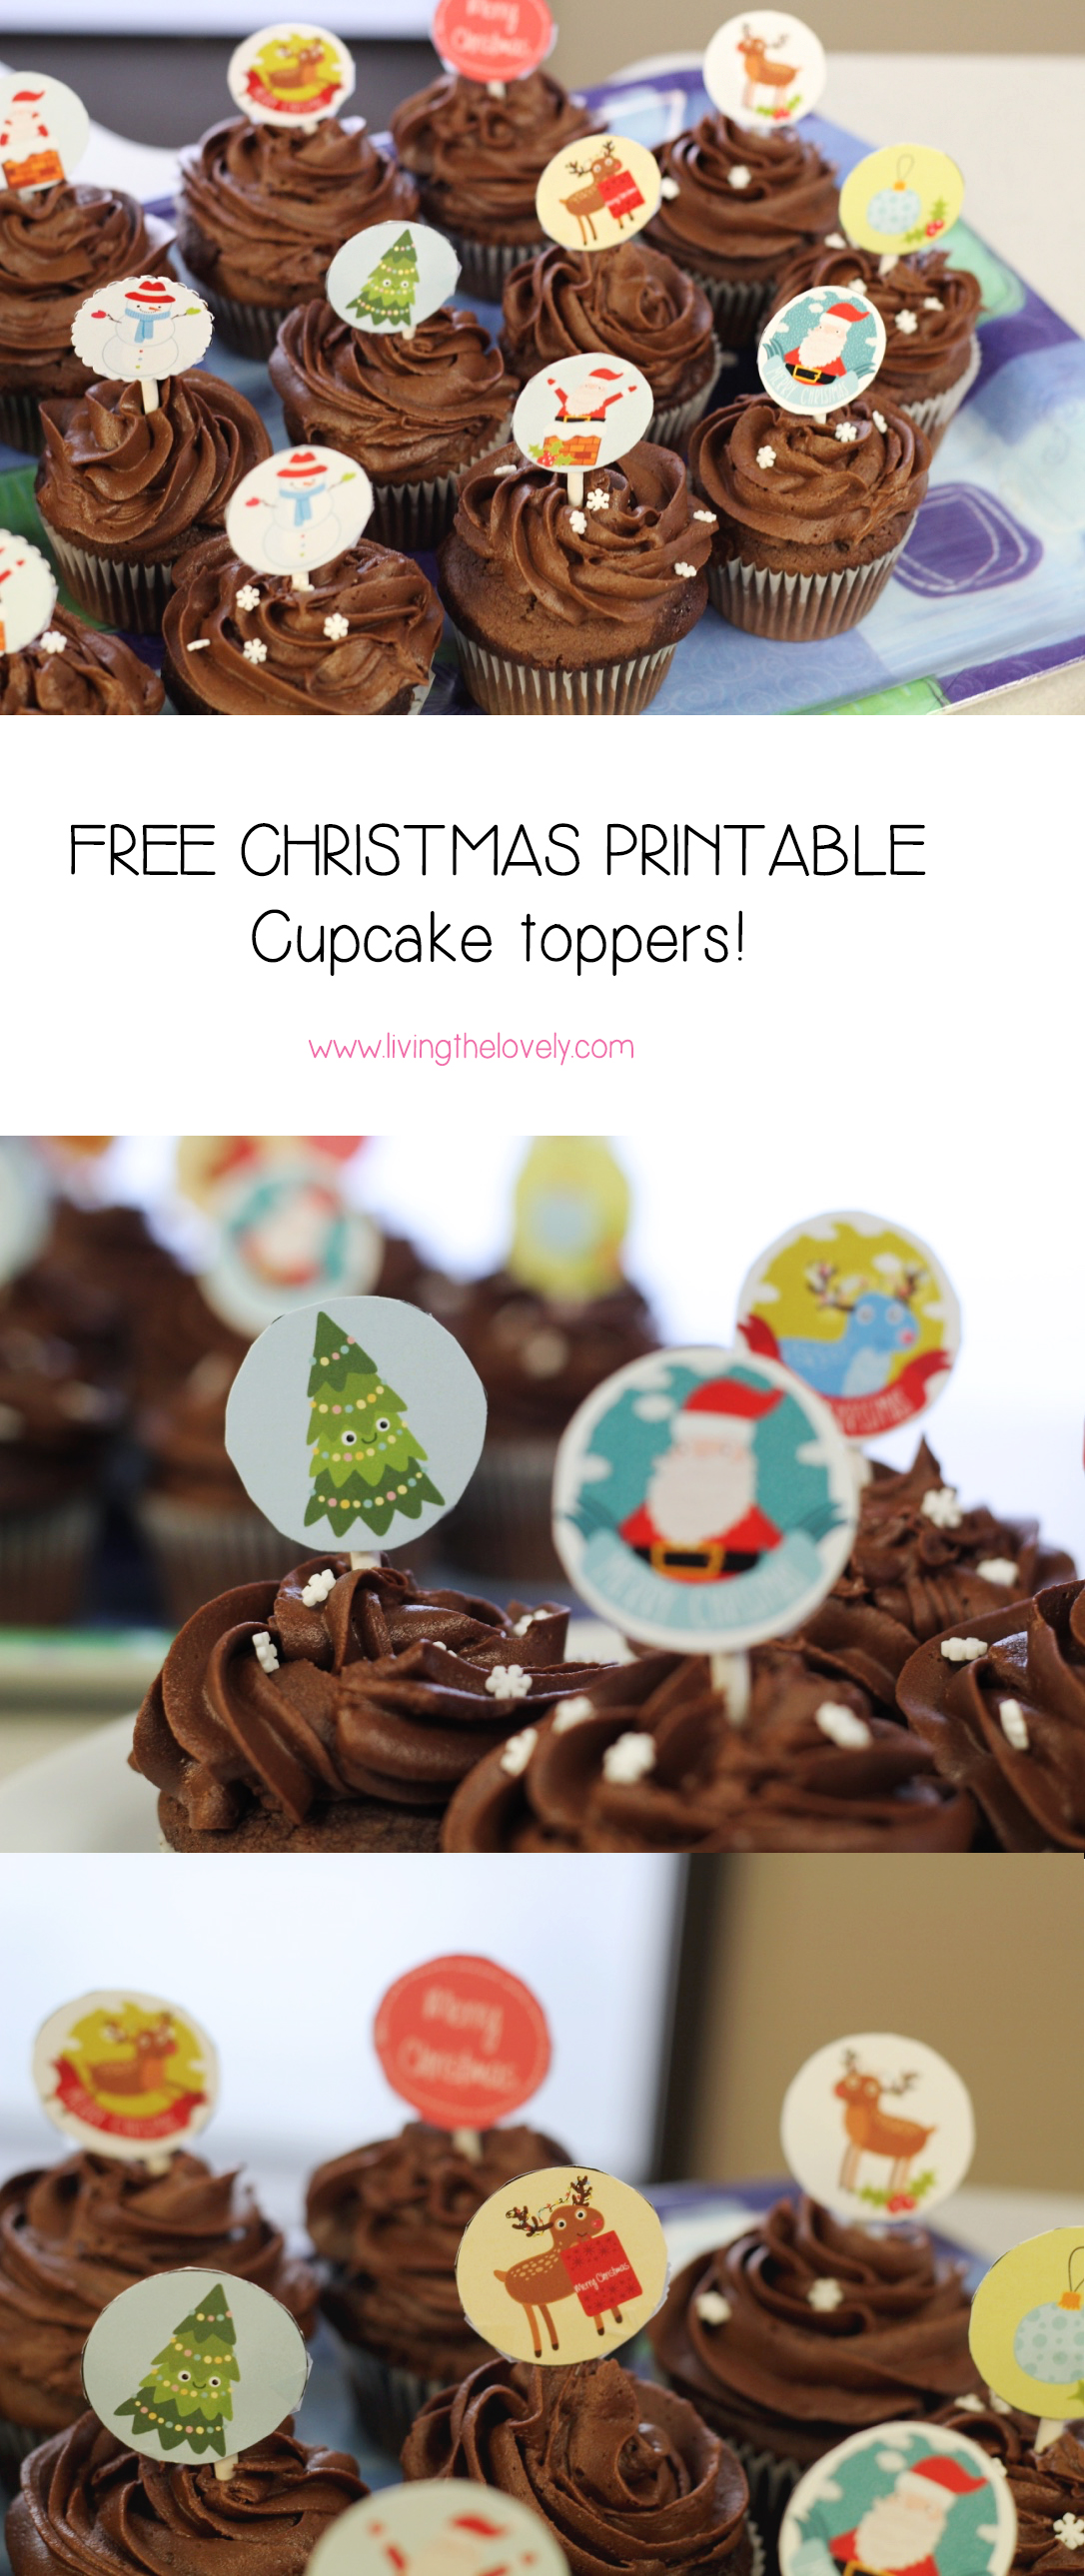
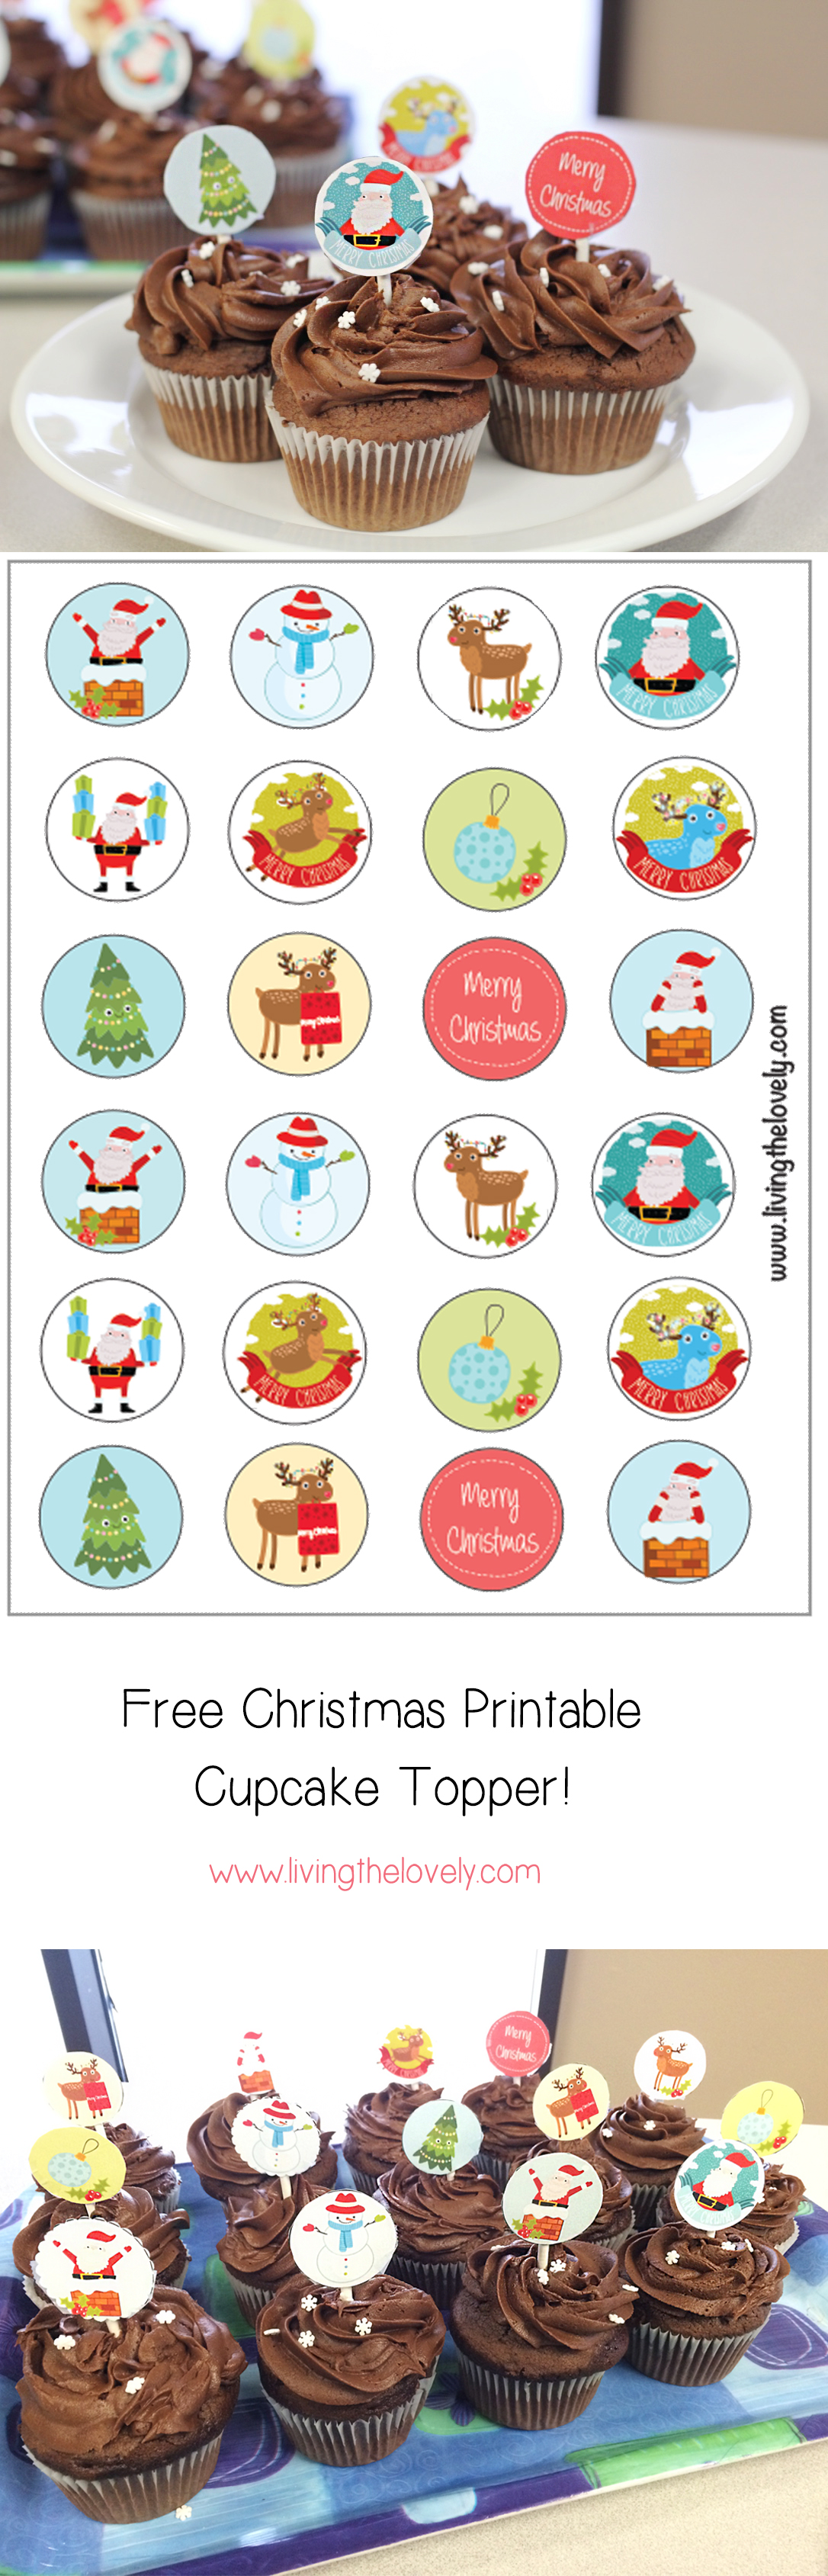
These were a great hit at work and everyone loved them! I piped a swirl with Wilton's 1M tip, and sprinkled some white snowflake sprinkles on some of the cupcakes and left some plain. I then stuck on the printable cupcake toppers. Everyone was really impressed with it and I even got asked more than once if I had purchased them from somewhere! WIN FOR ME! :D

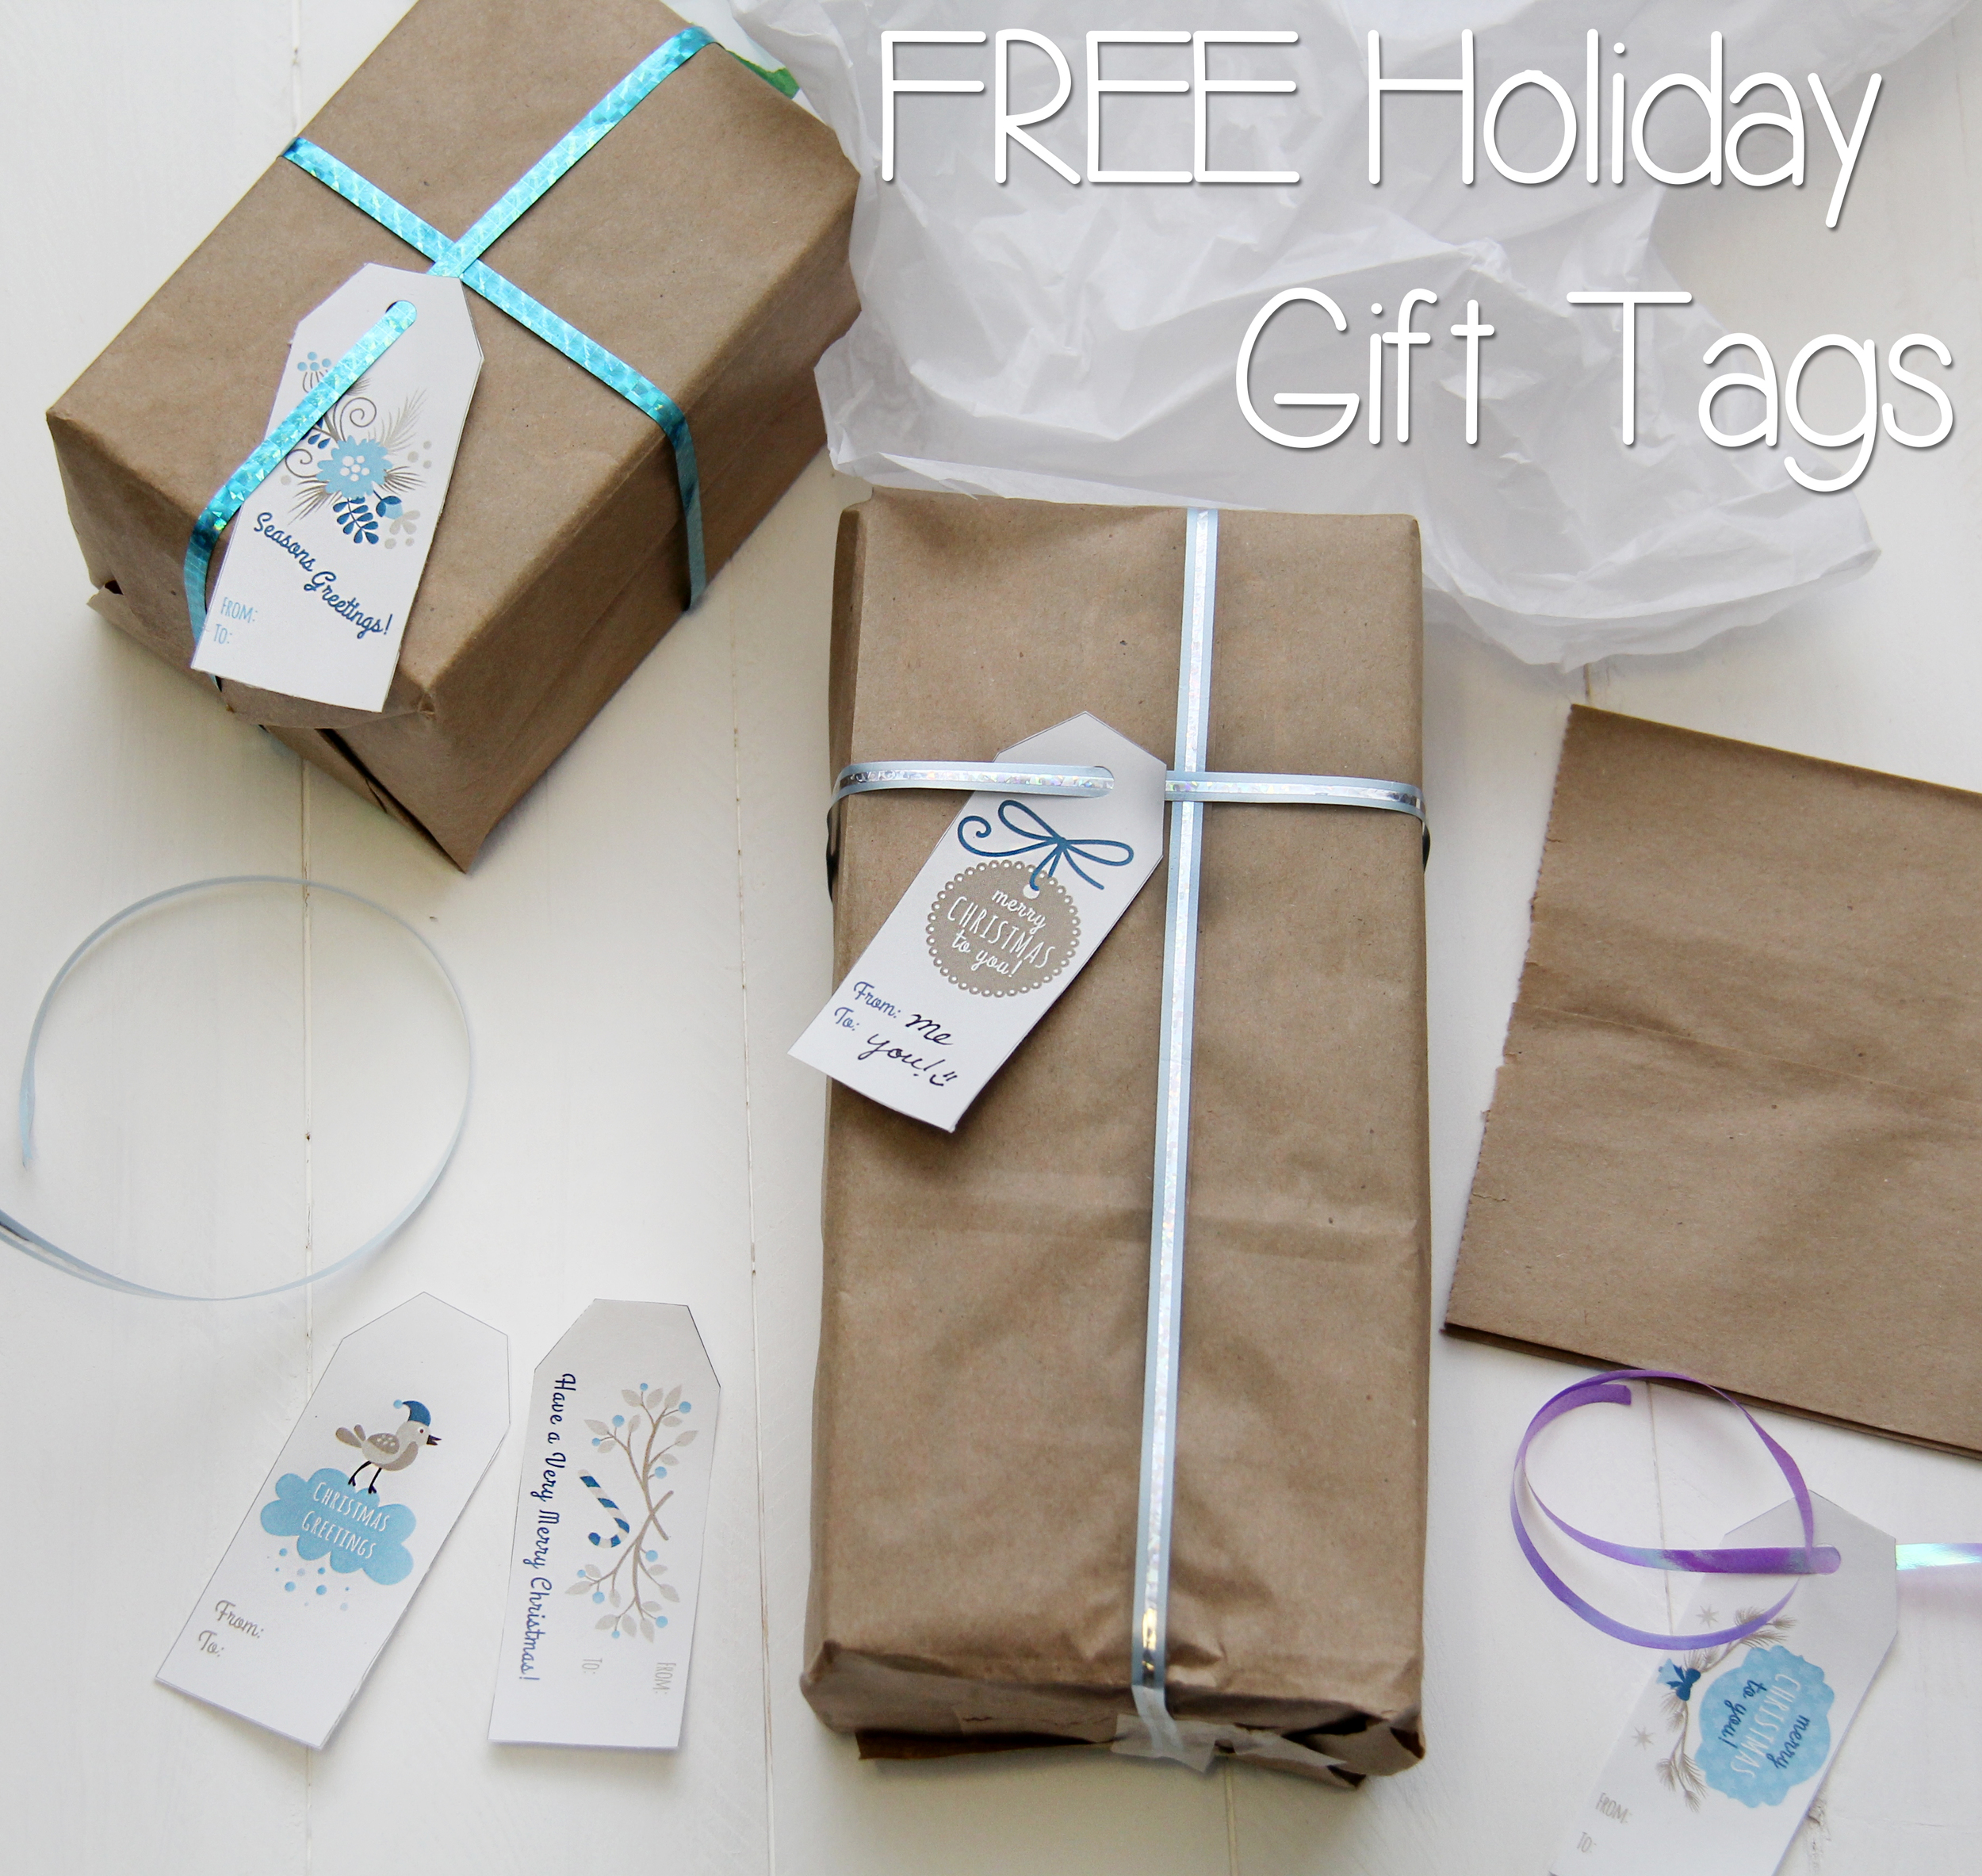
Anyways without further adu, here are some pics of the final result, followed with a link to the actual free Christmas printable. What you want to do is to either print it either at home or at a printing centre (I printed at Staples!), preferably using thicker stock paper, then cut out, and stick on to lolly sticks or toothpicks. Easy as that! If you do end up trying them please send me a pic - I would love to see it! :) Merry Christmas! 

A FREE Christmas Printable! Its a series of super cute christmas themed cupcake toppers you can print at home! Great for a fancy looking treat to take to a Christmas Party!

Super Easy Natural Homemade Butter!


How to make homemade all natural butter! Super easy with step by step pics! Makes such soft and creamy butter!


Wow 3 posts in one week! That sure is a first for me…here's hoping I can stick to a more consistent posting schedule! Today I'm sharing a really neat 'recipe'. The reason I put a ' ' around the recipe is that it's not so much a recipe but an old method that has been used for centuries by humans – namely, butter. Most of us who have been born and raised in big cities have never been exposed to the process of making butter. Sure, we know it comes from milk, which comes from cows, but that’s about where most people's knowledge on the butter making process ends.

 Back when I was in third grade, our class had a 'live like a pioneer day', where we were supposed to dress up like pioneers and live as they would have. This included no electricity or paper, which meant working on mini chalkboards with the lights off! This was quite fun for a third grader and we really enjoyed the experience. But what made it even more fun was, the thing that makes everything more fun, the food! In class we made our own bread by mixing up the flour with the rest of the ingredients, and setting it out to poof. Then our teacher baked the bread during lunch break in the staff's kitchen. It was all really amazingly fun, and it’s a memory I still think back on and smile. But perhaps what was most fascinating to 8 year old Zahra was what we made in class to go 'on' the homemade bread – homemade butter! Our teacher poured some whipping cream into a jar, and screwed the lid really tight. She then asked us to sit in a circle and pass the jar around one by one, with each of us shaking the jar vigorously with our hands until we couldn’t shake anymore! I remember being both skeptical and in awe….could *we*, the young little children of room 3, truly, possibly, make… butter?! SO shake, and shake, and shake we did, each of us hoping that *we* would be the one who made the magical shake that turned the cream into butter. Finally, after a good 20 minutes of shaking the cream, EUREKA! We had butter! Of course it was a bit soft and liquidy, but we didn’t care! We made butter! We slathered it on some of our homemade bread, and boy was it a delicious snack on a dark (since the lights were off) afternoon.


Make super soft and creamy homemade butter! Super easy with step by step pics!

Since then I have always wanted to go back and 'try' it myself – to recreate this homemade butter, but this time do it 'right'. You know. The adult way. However, every time I needed butter I would do the normal 'adult' thing to do – which was buy it from the grocery store. However, about a week ago I was helping my mom with the groceries when I noticed the whipping cream we usually get was on sale. I grabbed a package of it, with the plans of baking something (wasn’t quite sure what yet), and headed to the cash. However, at the cash I realized ' aww man, I forgot the butter!' Anyone who has walked alllll the way across a huge grocery store to the check-out cash, only to remember that they forgot to pick something up on the other end of the store, will know that you will come up with any excuse to NOT go back. At that moment while holding a 1L container of whipped cream, all I had to do was look down at the excuse I was so conveniently holding – I'm going to make some homemade butter! :D

So here it is - how to make butter. It's surprisingly easy and actually makes a delicious final result! It’s a very nice fluffy and SOFT butter that you just don't get in the store bough kind. Best of all, it's healthy, natural, and preservative fee! And if you like you can even buy organic whipping cream and make some organic butter! Yum! 

So lets begin, I've outlined the basic ingredients and steps needed, but this needs a bit more of a visual so I have some step by step photos / personal tips for you too. 


How to make homemade all natural butter! Super easy with step by step pics! Makes such soft and creamy butter!

Homemade Butter

  • Whipped cream – at least 35% (nothing less)
  • Salt to taste (optional) – I make unsalted butter
  • ICE COLD water
  • Something to make it with. I made it in my kitchen aid mixer, but you can make it with a hand mixer or even a jar like I did in the third grade :) 
  1.  Pour your cream (no measurement… however much you want. I used ¾ of a 1L container but you can use more or less depending on how much butter you want) into your stand mixer. Beat the cream at low-medium speed until it turns into whipped cream. Then beat at high speed until the cream curdles and makes chunks.

  2. At a certain point it will start 'leaking liquids'. At this point you want to cover your mixer with a cloth or plastic wrap to prevent splashing. Keep beating until you have hard formed butter in your mixer (see pics below). At this point you want to drain that liquid out – but keep it! This is butter milk and can be used in lots of yummy recipes!

  3.  Add some ICE COLD water to your butter (1/2 – 1 cup depending on how much butter your making). Beat the butter and ice cold water together (be careful of splashes!) for a few minutes. Then stop and drain the water (it will be a bit murkey). Then repeat the same steps again. I do it about 3 times or until the water is kind of clear. This is done to 'clean' your butter and draw out all the moisture. This allows your butter to last longer without going bad. If you are going to consume your butter in the next few days then you can skip step 3.

  4.  And that’s it! Once you have beaten the ice water with the butter to the point that the water isn’t too murky, you can drain the remaining water and 'pat' the rest out with your spatula. And there you have it! Butter! You can put it in an airtight container and it lasts for a good month!


And heres a visual of the above, which is also pinnable! :)

a step by step tutorial on how to make homemade organic butter! (theres two parts)
how-to-part-2.jpg


a great guide on how to make homemade all natural butter! Who would have thought butter could be so easy to make at home? and so soft!

Free Printable - Christmas themed Santa's Milk and Cookies


Hello my Lovelies,

Look what I made! A Christmas themed printable. Just for you :)


A Free Printable for Christmas! Print out and stick on a Label for Santa's Milk, Santa's Cookies, and some magical reindeer food! ;)


Its a cute little printable that I'm sure kids (and adults alike) will love! Its a really quick and easy craft which you can make with the kiddos on Christmas eve. This year instead of just putting out a glass of milk with a plate of cookies why not get more creative - I'm sure Santa will be pleased! ;)

A Free Printable for Christmas! Print out and stick on a Label for Santa's Milk, Santa's Cookies, and some magical reindeer food! ;)


One of them is a printable for 'Santa's Milk', the other is a printable for 'Santa's Cookies', and an extra bonus for Santa's reindeer! Santa might get well fed on Christmas Eve, but what about poor Rudolph and Dasher, Dancer, Prancer, Vixen, Comet, Cupid, Donner, and Blitzen ? Carrying all those gifts can be pretty tiring, so why not leave out some baby carrots or other treats for some Magical Reindeer food!

A FREE Printable for Christmas! Print out and stick on a Label for Santa's Milk, Santa's Cookies, and some magical reindeer food! ;)


And since 'tis the season' , I'm sharing these printables with you free of charge! :) Enjoy and please feel free to share with me pictures of how they turned out either through the comments or email, or even through my social media....I would love to see how they turn out!


Happy Crafting and Happy Holidays :)

A Free Christmas Printable! Print out and stick on a Label for Santa's Milk, Santa's Cookies and Magical Reindeer food! A great fun little craft for the kids for Christmas Eve!


And in case you would like to pin this ;)


A fun little christmas printable ! And more importantly its free ;) Its a great DIY craft to do with kids on Christmas eve :) Santa's Milks, Santa's Cookies, and Magical reindeer food!

FREE Christmas Holiday Gift Tag Printable!

LOOKIE what I made! :)


free holiday gift tage


Today I was sipping on my tea in the local coffee shop, watching all the people walk about doing their holiday shopping, when I suddenly got inspired to make some lovely gift tags! With all that money spent buying the perfect gift why spend more for some gift tags? Especially when you can just make them at home (and give it that extra home made level of love), and most importantly - its free! 

Thats right. In the spirit of the holidays I have decided to make some lovely gift tags available for FREE! :D YAY! Consider it my holiday gift, from me, to you! 


Just click HERE to download the pdf and print on some nice card stock paper. And follow these simple steps:


1) Gather materials - printed tags, ribbon, one hole punch (or use just one hole of a regular hole puncher), pair of scissors, and something to write with!

2) Cut out the tags you like. I was sure to make some that include both christmas themes and general holiday themes to suit everyone on your list! :)

3) Hole punch the top part

4) Thread some ribbon, and Success! You have made your own gift tag!


I really enjoyed making this so please let me know if you used it and like it :) I just might add a matching napkin holder next week!


Hot Coconut Oil Hair Treatment

So this is for all my sistas out there who suffer from poofy, frizzy, out of control (often curly) hair. 

This is also for my other sistas who suffer from super dry or damaged hair. 

Heck, this is for alllll my sistaasss :)

I present to you the MAGIC that is coconut oil! As a thick & curly haired girl I have struggled with poofy, frizzy and, lets be honest, plain old gross hair. Due to my super curly hair (that everyone other than myself seems to love) I have been forced to inflict upon it some severe form of undue torture - otherwise known as the STRAIGHTENER!! *dum dum duuuuummm* This has had the effect of giving me the lovely straight hair I have always craved, but at the cost of damaging and further drying my already super dry and damaged hair. NOT a good mix. 


In my quest to fix this unruly hair I have tried many, many, many products. From the cheap and affordable drugstore stuff to the expensive salon quality. NOTHING seemed to work. Or they did, but… not *really*. It would make my hair look good for a few days, and then it would revert right back to it's original grossness. There was nothing permanent. Nothing lasting. Nothing that would actually REPAIR my hair (as the shiny bottles promised), but were rather more of a temporary fix.

One day I was sighing and complaining about all this loveliness to a class mate and she mentioned the idea of using something 'all natural'. I whined "But I have already tried all that!" I protest-eth. "I've tried everythinggggg. I've tried olive oil, egg yolks, yogurt, and every other cure. Nothing works!" That is when she embarked upon me her wisdom: Coconut Oil. She explained that she used it on her hair, on her face, on her nails, and even in her food! It was Amazing!!!!! I was skeptical, but mentioned I might give it a try (though to be honest I wasn't planning it - I had paid for soooo many other apparently tried and true cures that had never worked and was really not looking forward to trying another one). 

Fast forward a few weeks later and I am grocery shopping with my Mom.  I was put on the dreaded  'wait here and watch the cart' duty. As I waited for her to return, I looked around the shelves and saw that right in front of me there was a bottle of coconut oil. This was a SIGN right?! Probably not. It's just coconut oil. But I decided to give it a try, and boy am I glad I did!

The results were amazing and instantaneous. And what was more, is that it also improved the quality of my hair with each application! I find you can FEEL your hair getting more moisturized, and coming back to life. I usually end up needing to use less conditioner, and spend less time fixing and maintaing my curls. It also helps a lot with your dry and burned ends - I usually concentrate quite a bit on those ends. 


SO How can you take advantage of this miracle oil blessed upon us frizzy haired gals by the Heavens themselves?


1. Buy GOOD Quality Coconut Oil

The most important thing here would be to find some good quality PURE coconut oil. Make sure there isn't any junk mixed in there. A few things to look for are a) that it comes in a SOLID form and b) that it's organic if you can get it. You may be confused by the 'solid' part - oil and solid don't seem to belong together. In this case they do! Coconut oil is a solid at room temperature, but its part of the reason why its so awesome! (more on that later). Also, I know it can be hard to find sometimes, but it's important to buy some good quality ORGANIC Coconut oil if you can. You could of course use the regular kind (which I myself have) with similar results, but think about it - this is something thats absorbing in to your hair and your body, do you really want it to have been produced with a bunch of pesticides and chemicals? Nope, nope, nope! I was able to find a really good deal at Costco for some Organic Oil, but if you aren't able to find any near you, I have found a few examples online on amazon:


(I used Carringtons' on the right)

2. Prepare Hair

Comb and prepare your hair, and find yourself a hair clip. You don't need to have clean hair for this - in fact I usually do this right before I need a shower. Just make sure its combed and easy to run your hair through. If you have a LOT of hair you may want to divide it into sections but its not necessary.


3. How to use the Oil


coconut_oil_hair_treatment_frizzy

Now remember how I said coconut oil comes as a solid? So how do you apply it to your hair? Easy! There are 2 options, one you can take a spoon or two and put it in a bowl, and pop it in to the microwave and warm it up for a few seconds (be careful it melts fast!) and there you have it, a fancy spa quality hot oil treatment! And you didn't even have to get out of your PJs! 

Or, you can do what I like to do which is to warm up the oil in your hands. What I do here is take a small spoon full and put it in the palms of my hand. Then you start rubbing your hands together! The heat from your hands melts the oil (I told you it melts fast!), then run your hands and fingers through your hair to get the oil on. To apply the oil to your hair I suggest working from the ends up, and avoiding the scalp if you can (it produces enough oils itself!). Since I have a lot of poofy hair I tend to split it up into sections, and add a little bit of oil at a time to each section. Once I am done doing all of this I like to put my hair up in a clip.

Now, you have more options. One, you can just let the oil sit in your hair. Or two, you can apply a shower cap and then run a blow drier all over your hair to heat up the oil when its on your head. Another instant hot oil treatment! :) This has the effect of opening your hair follicles and allowing the oil to truly penetrate down into the hair. 

What makes Coconut Oil super awesome and different than other natural oil treatments like Olive oil is it doesn't drip. Remember how I mentioned earlier what makes Coconut Oil awesome is its solid state at room temperature? Well, uh...thats why! In the past, whenever I would attempt an olive oil hair mask, it would always make such a mess. The oil wouldn't sit still in my hair and would constantly drip down my neck (gross) and get on my clothes (super gross). But not with coconut oil!  This magical creature stays put where its supposed to because of the very important detail I just mentioned - its a solid at room temperature! So even when you melt it to apply it, when left alone in your hair it will eventually solidify at room temp! No more drip!


4. How Often, How Long

How long you leave the coconut oil on is your choice. I have done it for only 10-15 min before popping in to the shower, and I have also done it for a few hours. When my hair is especially damaged, I like to apply it for quite a few hours on a Saturday when I am planning on staying in and getting some chores done like cleaning my room, washing dishes, doing laundry or making lunch. Ok, lets get real - when I am at home on Saturday and eating a 3 hour breakfast in front of Netflix. 

I've also done it over night before, and since it doesn't drip, all I had to do was wrap a scarf around my hair and it caused no problems with my fancy shmancy pillow cases.


So give it a try and let me know how it goes! :) And if you have anyyy dry hair/face/skin/body suggestions of your own please let this dried up girl know!