Quick and Easy Triple Berry Tart Recipe

Hello!!

Long time no post! I'm so very sorry. Seems like I'm failing on those new years resolutions already! *fail* But I *do* have a good reason! Kinda. Sorta. See back in late January I ended up taking a very last minute (I'm talking a few days notice) 3 week vacation, which made it really difficult to update regularly! Not for lack of trying though! I had even prepared a Valentine's day recipe and a DIY craft, and photographed it all the night before my departure and was planning on posting updates while on my vacation. Unfortunately I ran into some unforeseen problems with internet connection while I was there – I was promised high speed wifi and was left with internet that wouldn’t even connect!

Alas, after many, many, many frustrating attempts to connect to the interwebs I took it as a sign from the universe to just chill and actually *be* on vacation. So I did! However, when I got back I ended up getting really sick (caught something awful on the plane ride back), and then drowning in work (it happens when you take 3 weeks off). After all that, life caught up with me and things have been really busy, and before I knew it its been 3 months!

However, all this time away doesn’t mean I have been doing nothing worthy of blogging about! Oh contrer! If you follow me on Instagram you will see I have been preoccupied with starting up a garden and many other fun stuff. I've been trying lots of new things and new recipes and am excited to come back with lots of fun new content! :)

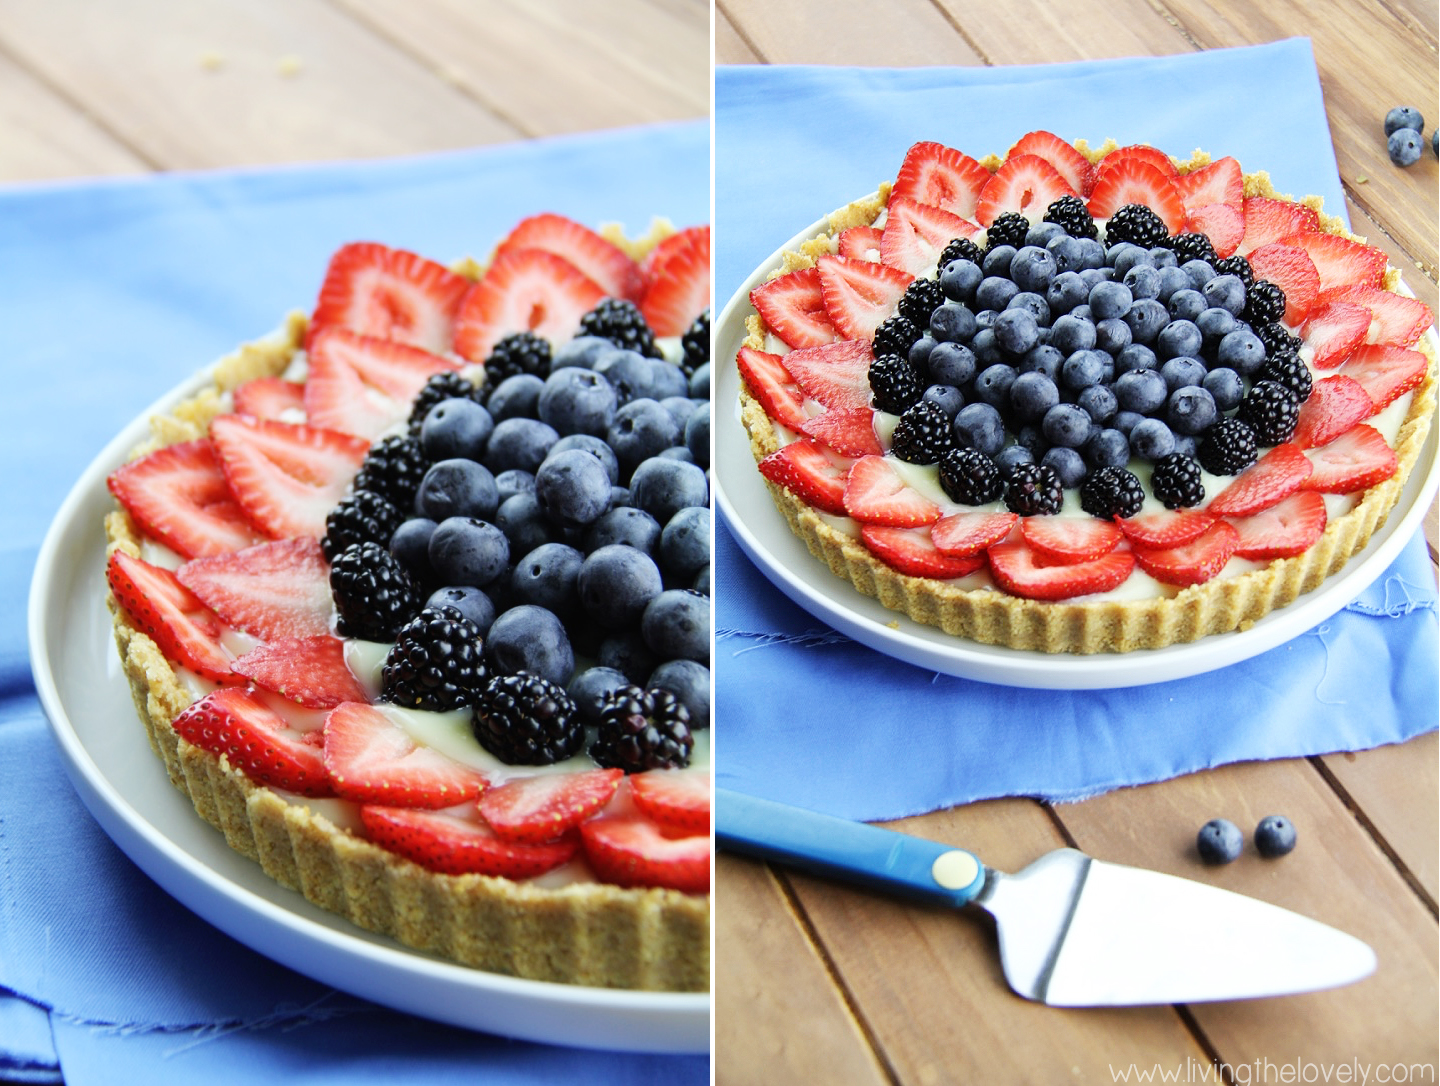
quick and easy triple berry tart recipe. What I love about it is its no bake, only 5 ingridients from the pantry, and super simple. But it  LOOKS fancy! All the look none of the work ;)


So in order to make it up to you, here's a recipe for a super easy and super delicious Triple Berry tart which really signals that summer has arrived!! If you have been super busy like me, but need a quick delicious dessert, that also makes a statement, then look no further! This is really great for when you want to make a great homemade dessert for a party or special event, but don’t have the time (or just feeling too lazy) to make anything too complex. And what with the crazy heat of summer well on its a way, its a great dessert to take to your neighbourhood bbq which has the added bonus of not needing to turn on your hot oven!

quick and easy triple berry tart recipe. What I love about it is its no bake, only 5 ingridients from the pantry, and super simple. But it  LOOKS fancy! All the look none of the work ;)


This tart can easily be changed and customized in endless ways to whatever fruit you have whether it be different types of berries, or perhaps banana slices, or kiwi, or even some peaches! You could even change the pudding flavours!

So make this super quick and easy Triple Berry Fruit Tart and let me know how it goes 😃

quick and easy triple berry tart recipe. What I love about it is its no bake, only 5 ingridients from the pantry, and super simple. But it  LOOKS fancy! All the look none of the work ;)


Triple Berry Tart

* 10 sheets of graham crackers, crumbled up (or roughly 1.5 cups)
* 1/3 cup sugar
* 1/2 cup of melted butter
* 1 pudding packet (I used Jello brand that serves four)
* Milk as required by pudding packet
* Fruit to Decorate

1. Break up your graham cracker cookies into smaller pieces by hand, and then place in to a ziplock bag. Seal firmly. And bang it with a rolling pin! (great therapy! lol) keep banging it until its nice and crumbly.Once completely crushed pour crumbs into a large bowl. If you don't have cookies but rather the crumbs, this should equally roughly 1.5 cups, so measure that and pour it into a bowl.

2. Add your sugar to the crumbs and mix until throughly incorporated. Then add in your melted butter and mix! Depending on a variety of things you may need a bit more cookies or a bit more butter. You want to be able to mix it to the point where it becomes like sand that will hold its shape when squished down.

3. Take your tart pan and press it all down in the pan to form a crust. Place in the fridge to set for a few hours. 

4. Prepare your fruit topping - wash and slice!

5. Once the crust has set in the fridge, prepare your pudding mix by mixing the required powder to milk mixture called for on the box. It will be liquidy at first but if you keep mixing it will thicken! Pour your thickened pudding mixture into the tart. Decorate with Fruit. Place in fridge to set until ready to be served!

Bon apetite! 😃 

quick and easy triple berry tart recipe. What I love about it is its no bake, only 5 ingridients from the pantry, and super simple. But it  LOOKS fancy! All the look none of the work ;)


Quick and Easy Baked Cinnamon Sugar Doughnuts


Super quick and easy to make baked cinnamon sugar doughnuts! These are seriously SOO good they disappear super quick!

About a year ago I noticed a growing trend of doughnut recipes everywhere on the internet. Cool! I thought. I didn't realize making doughnuts at home was so do-able. But seeing as doughnuts aren't the healthiest of things, and I was at that point in time trying to lead a more healthier lifestyle, I decided to not really 'look into' this trend. I mean doughnuts are basically sugary dough deep fried in oil - not exactly healthy! 

Then, last winter, during a quick trip to Michaels to buy some arts and crafts supplies, I happen to pass their baking aisle, where I noticed something pretty cool! A doughnut baking pan! I had never seen one before and all of a sudden I realized...aha! maybe all those doughnuts weren't fried. Maybe there were baked! And thats when it dawned on me. OH MY GAWD I NEED TO MAKE DOUGHNUTS. However, being in a hurry I decided to come back for the pan another time (I mean there were like ten of them so what were the chances of them selling out?) So I came back a week later to pick some up when I found out they had sold out! (I guess the chances of them selling out wasn't so far fetched after all huh?! :( ) I called two other stores in the city and none of them had any stock either! It ended up taking me a good 7-8 attempts before I was finally able to locate a pan and buy it.


^ The impossible pan to locate, which I then located on amazon *face palm*


By then anticipation had grown and I was super excited to make those darn doughnuts already! So I ended up using a recipe that came with the pans and they turned out.... *drum roll please*....pretty horribly. Yeah. It was kind of a bit of a let down. Well a big let down considering all the time it took to locate the darn pan in the first place! I figured, hey, maybe theres a *reason* doughnuts are fried and not baked - maybe the reason is they turn out pretty gross!


So I gave up and packed up my doughnut pan and put it away in storage. 


Then I stumbled across said pan about a week ago as I was looking for other things in storage, and I decided to give this baby one more chance before exiling it permanently into the land of unwanted things. I searched all over for a good recipe (you know, to give the poor pan a fighting chance) and gave it a shot. I found this cinnamon sugar doughnut recipe and hesitantly gave it a shot. 


And it was SOOO GOODDD. OH MY GAWDDDD. Its unbelievable delicious. Like melt in your mouth amazingly perfect delicious. Seriously. The doughnut pan had been redeemed. Turns out it wasn't the baking that made the doughnuts gross but the horrible recipe I used! So if you are looking for a pretty simple baked doughnut recipe that tastes amazing look no further! 


And if you guys know of any other good doughnut recipes please do let me know as I would love to try them! :)


Recipe Review: I loved this recipe (in case the above paragraph didn't convey that enough ;) ). Its a quick and easy doughnut recipe that you can make with ingredients in your pantry but is super good. Its seriously the best cinnamon sugar doughnut recipe ever! The original recipe only makes 6 so I altered the below recipe to make 12 because 6 is just totally not enough. My family literally inhaled these in about 20 seconds and they were done. So do yourself a favour and make 12. or 24. or 48. I ain't judgin' ;)

P.S. My photography skills are improving aren't they guys?? :D I'm super proud of how they turned out this time :)

A quick and super easy baked cinnamon sugar doughnut recipe. I seriously love this recipe sooo much! Its Super easy and SOO GOOD!


Baked Cinnamon Sugar Doughnuts

Recipe from Kara

Ingredients

  • 1 1/2 cup flour
  • 4 Tbsp cornstarch
  • 2/3 cup sugar
  • 2 tsp baking powder
  • 1 tsp salt
  • 1 tsp cinnamon
  • 1/2 tsp nutmeg
  • 2/3 cup buttermilk *use homemade buttermilk if you like!*
  • 2 egg
  • 2 Tbsp melted butter
  • 2 tsp vanilla

    For topping:
  • 6 Tbsp melted butter
  • 1 cup sugar + 2 tsp cinnamon (mixed together)

Instructions

  1. Preheat oven to 375°
  2. Mix together all of the dry ingredients (flour, cornstarch, sugar, baking powder, salt, cinnamon, and nutmeg) in a mixing bowl. Set aside.
  3. In a small bowl, whisk together all the wet ingredients (buttermilk, egg, melted butter, and vanilla).
  4. Slowly add the wet mixture to the dry mixture and stir until just combined. (Don't over stir)
  5. Grease your doughnut pan really well and pour the batter in to the pan.
  6. Bake at 375° for 11-12 minutes. Let the doughnuts cool for a few minutes in the pan, then gently remove and place on cooling racks.
  7. Melt your butter for the topping. While still warm, brush all sides of each donut with melted butter, then dip in the cinnamon sugar mixture until well coated.

Healthy Roasted Garlic Onion and Potato Soup


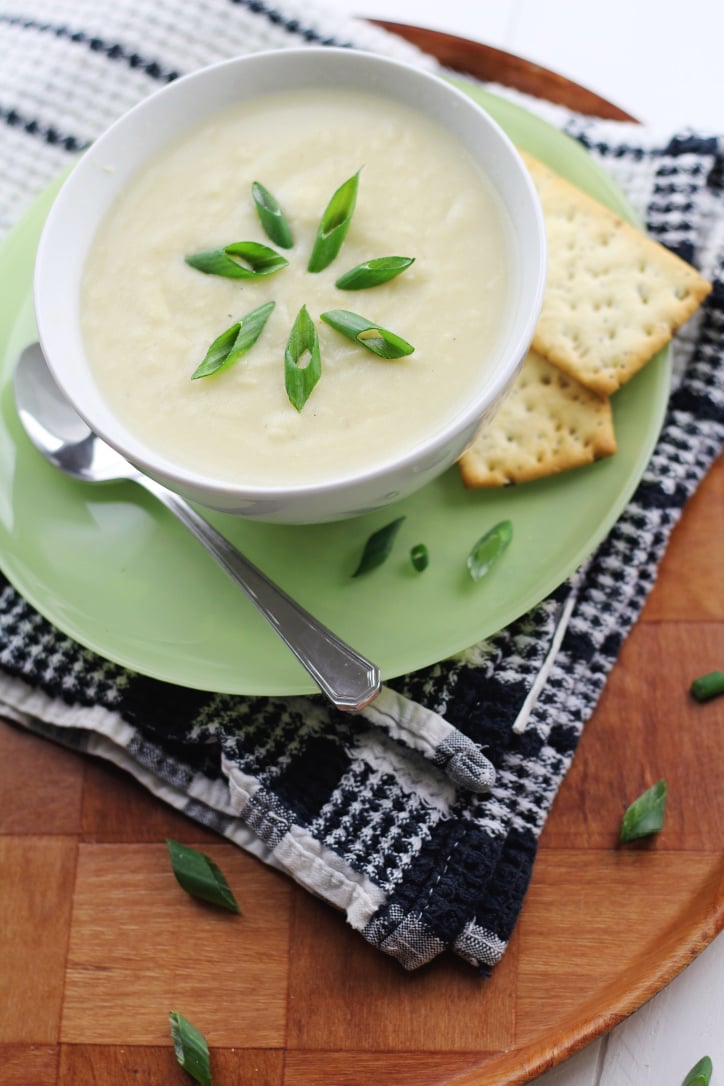
This recipe is a quick and easy soup to make that is great to prevent colds and flus! Packed with Garlic and Onions and very yummy!


I don't know about you and where you live, but here in Canada, winter is in FULL force. Just last week we had over 20 cm of snow fall in one day, and the windchill has us in the -20 range almost every day. As a result, cold and flu season also happened to be out in full force too! It feels like everywhere you go people are coughing and sneezing in your general direction, from the coworker at work to the cashier at the grocery store, the unmistakable sniffle and cough are everywhere. 

I've been trying my best to steer clear of a cold because really, who has time for that? Aside from chugging Vitamin C like its nobody's business I have also been trying to incorporate healthier and more nourishing foods in my diet that tend to have great anti viral properties such as garlic and onion. 

Onions are really high in antioxidants and possess anti-inflammatory properties. Apparently onions are extremely high in the antioxidant 'quercetin'. Quercetin helps the body fight free-radicals, and boosts the immune response. A recent study from the British Journal of Nutrition showed that individuals who ate foods high in quercetin (onion soup was used in the study), had better immune responses and less likelihood for cardiovascular disease [2].

Garlic is also a powerful antioxidant, but it also possess antimicrobial, antiviral and antibiotic properties! Garlic contains Vitamin C and can apparently provide decongestant effects when you do get a cold. Garlic has been used for centuries as a powerful medicine and was believed to have sacred qualities. In fact, some say that it was so valuable to the Ancient Egyptians, that cloves were always placed in the tombs of Pharaohs! Hey, if its good enough for the Pharaohs then its good enough for me! :) 

So if you are looking to boost your immune system to avoid catching cold from icky sickly people, or if you unfortunately have come down with something and you are one of those sickly people, try this delicious soup to get you back to your normal self sooner! 

This recipe is a quick and easy soup to make that is great to prevent colds and flus! Packed with Garlic and Onions and very yummy!


Roasted Garlic and Onion Potato Soup

(slightly adapted from here)

  • 1 large head of garlic
  • A few tablespoons of Olive Oil
  • 1¾ pounds (about 3-4 medium potatoes)
  • ¼ cup butter
  • ¼ cup flour
  • 3-4 large onions, chopped
  • 4 cups chicken broth
  • 1 cup milk
  • ¼ cup heavy cream
  • ¼ teaspoon thyme
  • ½ cup grated cheese
  • salt + pepper to taste

1. Begin by preheating your oven to 400F to roast your garlic. Cut off the top of a full head of garlic, making sure to go back and snip off the tops of the cloves you didn't catch (just a tiny snip to expose the garlic will do!). Place inside a square of aluminum foil and then pour some olive oil on top (it will get absorbed inside the cloves) and add salt and pepper to taste.Then wrap up the garlic and place in the oven for 40-45 minutes until the garlic is soft when you poke it with a knife. Then allow to cool completely before removing the garlic from the peel. While the garlic was baking I proceeded to the following steps.

2. Melt the butter in a large soup pan on medium high heat. Add the onions and cook until they are translucent. Add flour and cook for 1 minute (do not brown).

3. Add chicken broth, milk, cream, and thyme. Allow soup to come to boil then simmer for a few minutes, whisking until nicely blended. 

4. Add peeled and diced potatoes (make sure they have been chopped into small pieces so they cook faster!).

5. Once the potatoes have cooked (you can tell by poking them gently with a knife - if it goes in really easily it means its cooked),  add in all of your roasted garlic cloves and shredded cheese. Using an immersion blender, blend all the ingredients until smooth. Add salt and pepper to taste. 

This recipe is a quick and easy soup to make that is great to prevent colds and flus! Packed with Garlic and Onions and very yummy!

Healthy Eating and a Quick & Easy Apple Feta Cheese Spinach Salad


A really great and healthy salad that comes together really quick and easy and would make a great lunch or dinner. Recipe for apple feta spinach salad includes a dressing recipe.  ALSO HAS NUTRITION INFO!


Hello Lovelies!

Keeping up with my (and probably many other's) New Years Resolution to eat healthier, I thought I would kick of my recipes for 2016 (woah, its weird. Its 2016 now...no more 15!) with something healthy. And what's more healthy than salad? Its basically a bowl full of veggies. Well the only thing healthier would be if it had fruit right? WELL IT DOES! Whaaattt. That’s right, an apple a day will keep the doctor away, so this salad with veggies AND apple slices should more than do the trick!


Now for most people the concept of putting fruits in with their salads is not a foreign one. Lots of people add fruits like apples and strawberries and clementine to their salads. These are the people I usually silently judged – I mean it’s a SALAD. All veggies. No fruits. Why are you ruining it?


But recently that all changed when I was forced to try a salad with apples at my work place's local bistro. I was running late on grabbing lunch, and at about 3 pm, you take whatever food they have left to sell to you. So I begrudgingly bought it, wrinkled my nose at it, and sat down to eat. And oh my god! I was very pleasantly surprised at how good it was! I was definitely not anticipating liking the sweetness of the apple in the salad (for me a salad is usually lemoney/garlicy/ savoury thing), but I really did! So much so I decided to come up with my own recipe. And so here it is: a healthy Apple Feta Cheese Spinach Salad!


Recipe Review: The best part about this salad is that it comes together real quick and easy and only needs a few ingredients. The rest of my family, like myself, were originally pretty skeptical of a fruity salad, but once they dug in they ate THE ENTIRE serving of it in one go! I would call that a success! The dressing is also really great as its not only really healthy, and fresh, and homemade, it's also pretty yummy. It’s got a nice balance of sourness and sweetness to counteract with the rest of the salad. We will definitely be making this a staple into our family's rotation.


A really great and healthy salad that comes together really quick and easy and would make a great lunch or dinner. Recipe for apple feta spinach salad includes a dressing recipe.  ALSO HAS NUTRITION INFO!


Apple Feta Cheese Spinach Salad

Ingredients

10 oz bag of baby spinach (we used one of those fully big containers you get from Costco!)

2-3 apples, cored and thinly sliced (I used 1.5 as the family was still pretty skeptical ;) )

1 small red onion, sliced into thin strips

1/2 cup celery, thinly sliced

1/2 cup toasted walnuts, chopped up

5 oz feta cheese, chopped into tiny pieces

1/3 cup dried cranberries


Cider Honey Mustard Vinaigrette

1/3 cup olive oil

4 tablespoons of apple cider vinegar

1 tablespoons of mustard

2 tablespoons of honey

1-2 tablespoons of lemon juice

1/4 teaspoon of garlic powder

Salt and pepper to taste


Directions:

  1. Toss together all of the salad ingredients. (yes it's that simple, it is just a salad after all! ;) ) **note: If you are using onions that happen to be very sharp (mine caused me to start crying a river with the first slice) you might want to run them under cold water for a few seconds to get rid of the bite. Usually I enjoy the bite of onion in my salad but since this one has fruit in it you might want to tone it down. Up to you though!
  2. For the Dressing: Whisk all the ingredients up together in a bowl and pour over your salad. Serve immediately. (If you plan on having your salad later, do what I do and make the dressing separately in a Tupperware container that seals well. Once ready to serve, just shake the Tupperware around to mix and pour on your salad. It's what I do for when I pack salad for lunch the next day!)

And as part of my new year's resolution to learn more about what I'm eating, heres the nutrition info for this salad! If you make it into 6 servings (I calculated it as 6 big plates worth of salad), each serving only has roughly 300 calories, 20 grams of carbs, more than 4 grams of Fibre, and approximately 8 grams of protein! This makes it a healthy low carb / low GI (glycemic index) salad. The extra health benefits: 1 serving gives you whooping 42% of your daily Vitamin A intake, roughly 30% of your Vitamin C, 18% of your calcium, and 14% of your daily Iron intake. *Average approximation as the exact brands of ingredients you use could be different. This is based on a 2000 calories/day diet. 

Hope you guys found the nutrition info helpful! If so, let me know and I can continue to include them in my recipes :) 


Delicious super quick and easy apple feta spinach salad. high protein and fibre. Low calories and carbs. Low GI (glycemic index)
LOW CARB high fibre and protein spinach apple celery feta cheese salad. Nutrition info included. Super quick and easy for dinner or lunch.


Super Easy Natural Homemade Butter!


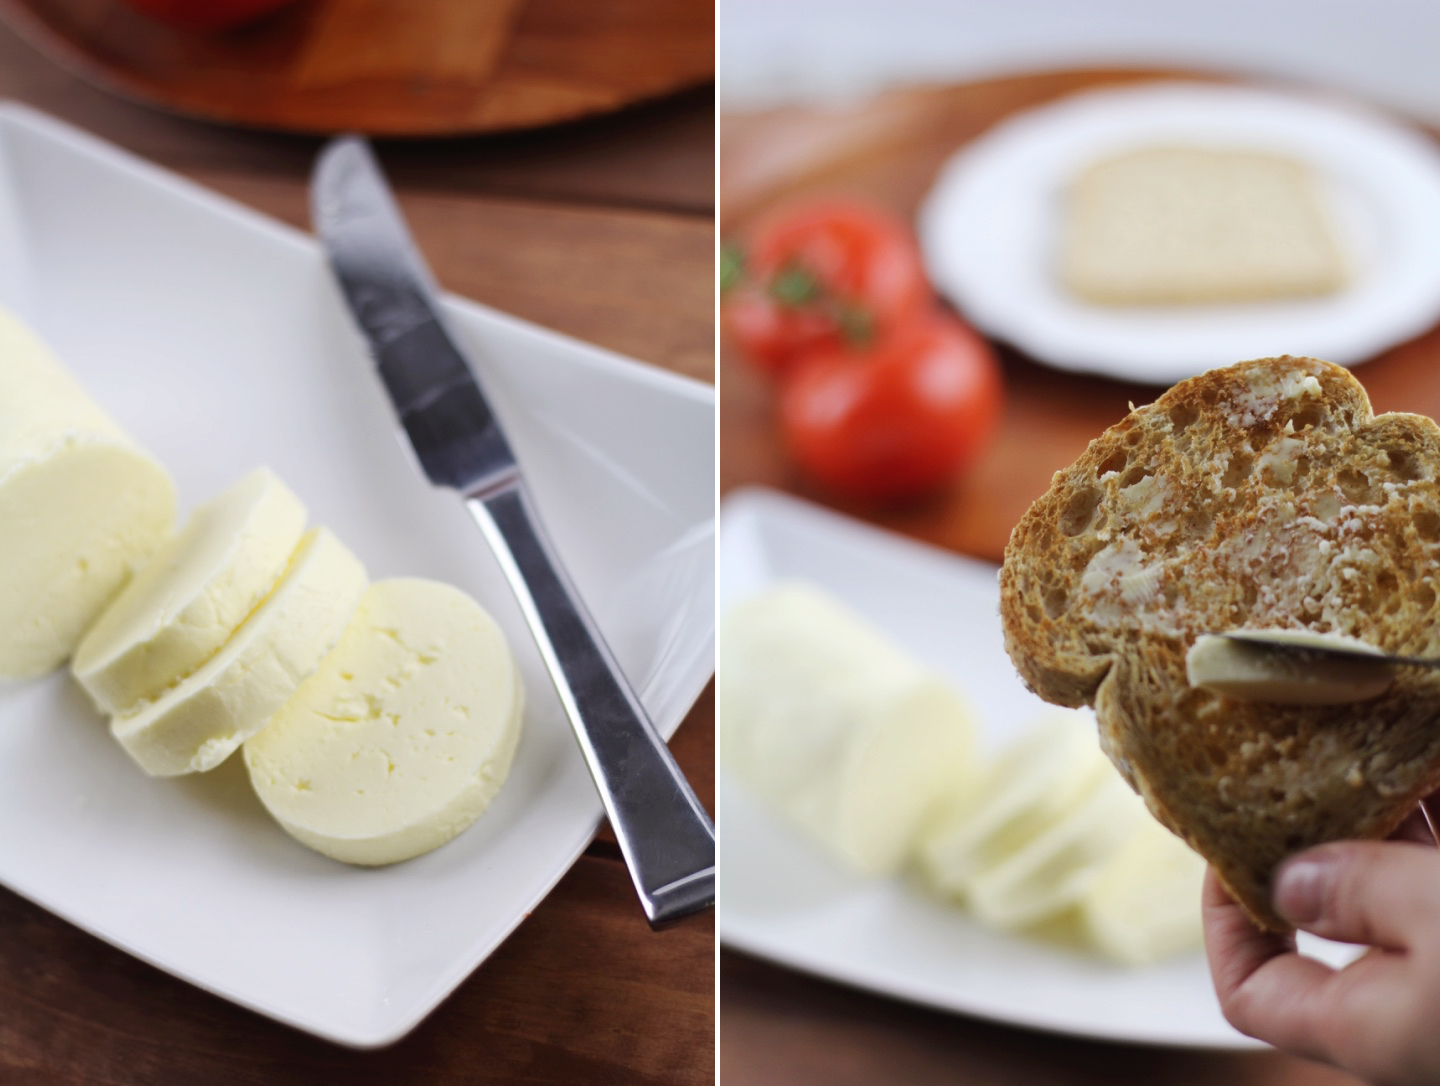
How to make homemade all natural butter! Super easy with step by step pics! Makes such soft and creamy butter!


Wow 3 posts in one week! That sure is a first for me…here's hoping I can stick to a more consistent posting schedule! Today I'm sharing a really neat 'recipe'. The reason I put a ' ' around the recipe is that it's not so much a recipe but an old method that has been used for centuries by humans – namely, butter. Most of us who have been born and raised in big cities have never been exposed to the process of making butter. Sure, we know it comes from milk, which comes from cows, but that’s about where most people's knowledge on the butter making process ends.

 Back when I was in third grade, our class had a 'live like a pioneer day', where we were supposed to dress up like pioneers and live as they would have. This included no electricity or paper, which meant working on mini chalkboards with the lights off! This was quite fun for a third grader and we really enjoyed the experience. But what made it even more fun was, the thing that makes everything more fun, the food! In class we made our own bread by mixing up the flour with the rest of the ingredients, and setting it out to poof. Then our teacher baked the bread during lunch break in the staff's kitchen. It was all really amazingly fun, and it’s a memory I still think back on and smile. But perhaps what was most fascinating to 8 year old Zahra was what we made in class to go 'on' the homemade bread – homemade butter! Our teacher poured some whipping cream into a jar, and screwed the lid really tight. She then asked us to sit in a circle and pass the jar around one by one, with each of us shaking the jar vigorously with our hands until we couldn’t shake anymore! I remember being both skeptical and in awe….could *we*, the young little children of room 3, truly, possibly, make… butter?! SO shake, and shake, and shake we did, each of us hoping that *we* would be the one who made the magical shake that turned the cream into butter. Finally, after a good 20 minutes of shaking the cream, EUREKA! We had butter! Of course it was a bit soft and liquidy, but we didn’t care! We made butter! We slathered it on some of our homemade bread, and boy was it a delicious snack on a dark (since the lights were off) afternoon.


Make super soft and creamy homemade butter! Super easy with step by step pics!

Since then I have always wanted to go back and 'try' it myself – to recreate this homemade butter, but this time do it 'right'. You know. The adult way. However, every time I needed butter I would do the normal 'adult' thing to do – which was buy it from the grocery store. However, about a week ago I was helping my mom with the groceries when I noticed the whipping cream we usually get was on sale. I grabbed a package of it, with the plans of baking something (wasn’t quite sure what yet), and headed to the cash. However, at the cash I realized ' aww man, I forgot the butter!' Anyone who has walked alllll the way across a huge grocery store to the check-out cash, only to remember that they forgot to pick something up on the other end of the store, will know that you will come up with any excuse to NOT go back. At that moment while holding a 1L container of whipped cream, all I had to do was look down at the excuse I was so conveniently holding – I'm going to make some homemade butter! :D

So here it is - how to make butter. It's surprisingly easy and actually makes a delicious final result! It’s a very nice fluffy and SOFT butter that you just don't get in the store bough kind. Best of all, it's healthy, natural, and preservative fee! And if you like you can even buy organic whipping cream and make some organic butter! Yum! 

So lets begin, I've outlined the basic ingredients and steps needed, but this needs a bit more of a visual so I have some step by step photos / personal tips for you too. 


How to make homemade all natural butter! Super easy with step by step pics! Makes such soft and creamy butter!

Homemade Butter

  • Whipped cream – at least 35% (nothing less)
  • Salt to taste (optional) – I make unsalted butter
  • ICE COLD water
  • Something to make it with. I made it in my kitchen aid mixer, but you can make it with a hand mixer or even a jar like I did in the third grade :) 
  1.  Pour your cream (no measurement… however much you want. I used ¾ of a 1L container but you can use more or less depending on how much butter you want) into your stand mixer. Beat the cream at low-medium speed until it turns into whipped cream. Then beat at high speed until the cream curdles and makes chunks.

  2. At a certain point it will start 'leaking liquids'. At this point you want to cover your mixer with a cloth or plastic wrap to prevent splashing. Keep beating until you have hard formed butter in your mixer (see pics below). At this point you want to drain that liquid out – but keep it! This is butter milk and can be used in lots of yummy recipes!

  3.  Add some ICE COLD water to your butter (1/2 – 1 cup depending on how much butter your making). Beat the butter and ice cold water together (be careful of splashes!) for a few minutes. Then stop and drain the water (it will be a bit murkey). Then repeat the same steps again. I do it about 3 times or until the water is kind of clear. This is done to 'clean' your butter and draw out all the moisture. This allows your butter to last longer without going bad. If you are going to consume your butter in the next few days then you can skip step 3.

  4.  And that’s it! Once you have beaten the ice water with the butter to the point that the water isn’t too murky, you can drain the remaining water and 'pat' the rest out with your spatula. And there you have it! Butter! You can put it in an airtight container and it lasts for a good month!


And heres a visual of the above, which is also pinnable! :)

a step by step tutorial on how to make homemade organic butter! (theres two parts)
how-to-part-2.jpg


a great guide on how to make homemade all natural butter! Who would have thought butter could be so easy to make at home? and so soft!